Convert the Data to SBuilder BMP Format
(optionally tweak them manually or with third party tools)
Create a new SBuilder Project with the title “Gibraltar”. On the “Class Scenery” tab, center your area to the above Lat/Lon (35° 30’ N / 05° 30’ W will do) so that your area of interest wouldn't disappear all of a sudden.
- Now SBuilder conversion starts with the undocumented import of BIL files: Choose “File --> DEM tools --> HGTT (SRTM) to BSQ conversion” and select your .bil files (change the standard filetype selector from “HGT” to “All Files” first so that you can see the bil files at all!)
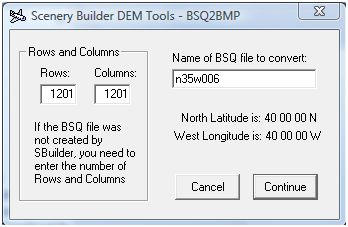
- In the following window, correct the Lat/Lon values according to your tile. The tile name (in this case) refers to the left lower corner of the tile, so for the tile “n35w006” you have to change the west longitude from E to W, and the east longitude from 07° E to 05° W. Be careful: The naming conventions for the different file formats also differ, so you have to be careful what you enter into this box! Finally you click the “HGT > BSQ” button and save the .bsq file.
- Only if you have several tiles to cover your LOD8 area: Avoid confusion and save all the bsq and bmp files in a separate subfolder. Repeat the conversion (steps 5 + 6) for all the other tiles. In our project repeat it for the “n36w006” tile.
- Only if you have several tiles to cover your LOD8 area: Merge the BSQ files. Choose “File à DEM tools --> Merge 2 BSQs …” and follow the steps. Leave the presets as they are and name the file “n35-36w006.bsq”.
- If you want, SBuilder gives you the option to view, process and up/downsample each BSQ in the “File --> DEM tools” menu. For the beginning I’d recommend to only view them. Processing goes fast, but doesn’t always make the results better.
- The final conversion step: Choose “File --> DEM tools --> BSQ to Bitmap conversion”, select your newly created, merged “n35-36w006.bsq” file and save it to .bmp format.